
 Nov
22
How to Seal Grout Lines Properly: A Step-by-Step Guide
- November 22, 2026
- 0 Comment(s)
Table of Contents
- Why Sealing Grout Lines Matters
- How to Clean Grout Before Sealing
- Grout Sealing Tools and Materials You’ll Need
- Penetrating vs. Topical Sealers: Which Type to Choose
- Step-by-Step Application Process for Sealing Grout Lines
- How Long to Wait Before Sealing Grout After Installation
- Best Grout Sealer for Bathrooms and Moisture-Prone Areas
- Drying, Curing, and Common Issues to Avoid
- Frequently Asked Questions
Last Updated: September 20, 2026
Why Sealing Grout Lines Matters
Grout is porous. Water, dirt, and stains seep right through it. Over time, your tile floors start looking dingy even if the tiles themselves are spotless. Learning how to seal grout lines properly stops this from happening.
Unsealed grout absorbs moisture, allowing mold and mildew to grow and stains to set permanently. Once this happens, cleaning barely helps.
Sealing grout lines is one of the cheapest ways to protect your tile investment. A proper seal creates a moisture barrier that keeps water and stains out, keeping grout cleaner and more vibrant while avoiding costly regrout work.
At Grout Shield Distributors, we’ve helped thousands of homeowners protect their tile surfaces since 1996. Whether you’re dealing with bathroom moisture or kitchen spills, sealing grout lines properly makes the difference between tile that looks new and tile that looks neglected.
The best time to seal grout lines is right after installation, or immediately after deep cleaning if your grout is already in place. Don’t wait until stains appear.
How to Clean Grout Before Sealing
You can’t seal dirty grout, dirt and stains block proper bonding. Use a stiff brush and degreaser to scrub each grout line, paying special attention to corners. For stubborn mold or mildew, use a stronger solution. Rinse thoroughly and let the grout dry completely, at least 24 hours, before sealing.
Steps for cleaning grout before sealing:
- Vacuum or sweep the entire floor to remove loose debris
- Mix your cleaner with water according to product instructions
- Apply the cleaner to grout lines using a stiff brush
- Scrub in circular motions, focusing on discolored areas
- Rinse with clean water multiple times until no cleaner residue remains
- Dry the grout completely with clean towels
- Wait 24 hours before applying any sealer
Damp grout will reject sealer. Use fans or open windows to speed drying, especially in humid climates.
Grout Sealing Tools and Materials You’ll Need
Essential tools:
- Applicator brush or small foam roller for applying sealer
- Microfiber cloth or damp sponge for removing excess sealer
- Painter’s tape to protect tile surfaces
- Gloves to protect your hands
- Proper ventilation (open windows or use a fan)
- Drop cloth or plastic sheeting to protect flooring
Materials:
- Your chosen grout sealer (penetrating or topical)
- Clean rags or paper towels
- Water for rinsing and cleanup
Use a quality brush designed for grout work or a foam roller, cheap brushes shed fibers into the sealer.
Painter’s tape saves cleanup time. Run it along both sides of each grout line before you start. This keeps sealer off the tile surface. Remove the tape immediately after sealing, while the sealer is still wet.
Never seal grout in a closed room without ventilation. Solvent-based sealers release fumes. Open windows and use fans to keep air moving. Wear gloves and avoid breathing fumes directly.
Penetrating vs. Topical Sealers: Which Type to Choose
Two main types of grout sealers exist: penetrating and topical. The right choice depends on your tile material, as using the wrong sealer can cause discoloration, surface damage, or failure.
Penetrating sealers soak into the grout without changing its appearance. They fill pores to block water and stains, remaining invisible once dry. They work best for grout you want to keep looking original, especially natural stone tiles, and typically last 3 to 5 years or more.
Topical sealers sit on the grout surface, creating a visible protective layer that may add sheen and enhance color. They’re easier to apply but wear away faster with foot traffic and cleaning, requiring reapplication every 1 to 2 years.
Sealer Compatibility by Tile Type
Your tile material is just as important as sealer type. Incompatible combinations can cause permanent damage.
Ceramic and porcelain tile are the most forgiving. Both penetrating and topical sealers work well on ceramic and porcelain grout. Ceramic tile is non-porous, so sealer sits on the grout line without risk of staining the tile itself. Porcelain is similarly stable. For these tiles, your choice between penetrating and topical comes down to aesthetic preference and maintenance tolerance.
Natural stone tile (marble, travertine, limestone, slate) requires penetrating sealers only, topical sealers can etch or discolor the stone. Always verify the sealer label states compatibility with your specific stone type, as travertine and limestone are especially sensitive to incompatible products.
Glass and metallic tile require penetrating sealers rated for these materials. Topical sealers leave visible residue on glass and are difficult to clean without damaging the tile finish.
Engineered stone (quartz composite) requires penetrating sealers only, as topical sealers create cloudy or uneven appearance.
Choosing Based on Your Tile and Environment
For ceramic or porcelain tile:
Place An Order Online or Call 1-800-631-0716 →
- Either penetrating or topical sealer works
- Choose penetrating for maximum durability and invisible protection
- Choose topical if you want enhanced color or faster application
- Resealing frequency: penetrating every 3-5 years; topical every 1-2 years
For natural stone (marble, travertine, slate, limestone):
- Penetrating sealer only, topical sealers will damage the stone
- Select a sealer explicitly labeled for your stone type
- Test on a small, inconspicuous area first
- Resealing frequency: every 2-3 years, depending on stone porosity and traffic
For glass or metallic tile:
- Penetrating sealer only
- Verify the product label confirms compatibility with glass or metal
- Avoid topical sealers to prevent residue on tile surfaces
For engineered stone:
- Penetrating sealer only
- Use products rated for composite or engineered stone
- Resealing frequency: every 2-3 years
Applying the wrong sealer type to natural stone or glass tile can cause permanent discoloration, etching, or damage. Always read the sealer label and confirm compatibility with your specific tile material before application. When in doubt, test on a hidden grout line first.
Step-by-Step Application Process for Sealing Grout Lines
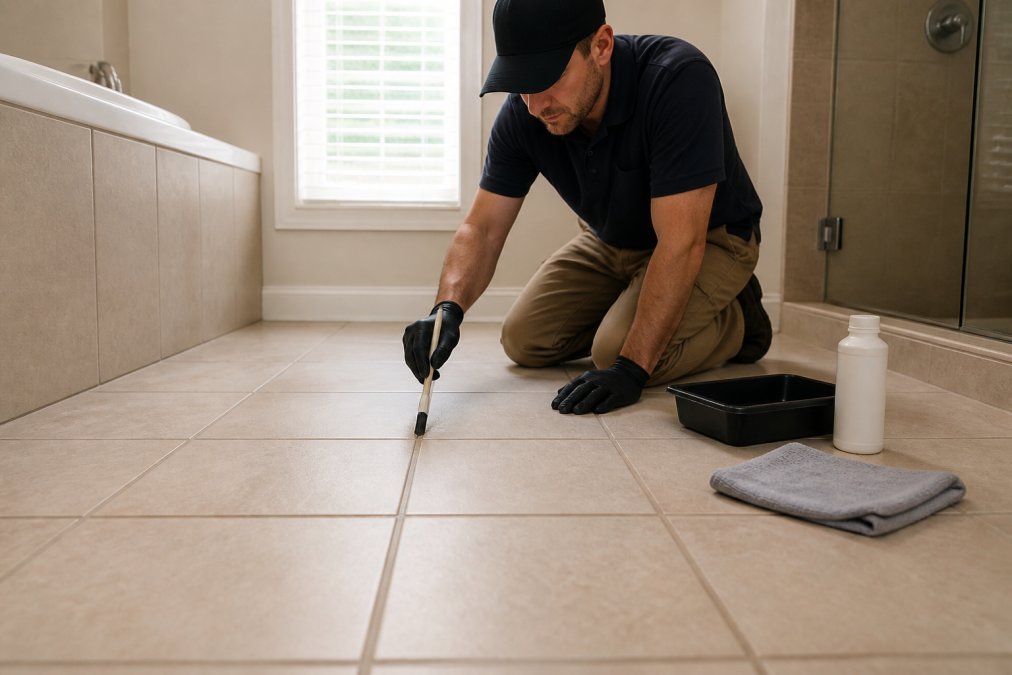
Start in a corner and work systematically across the room, applying sealer to one grout line at a time in small 3 to 4 foot sections to prevent uneven drying.
Applying the Sealer
Apply thin, even coats along each grout line, don’t oversaturate. Work in one direction for consistency. For penetrating sealers, you may need a second coat after the first dries. Move quickly, especially in warm or dry conditions, or work in teams for large areas.
Cleaning Excess Sealer
Use a damp microfiber cloth to wipe excess sealer off tile surfaces immediately after application, working perpendicular to the grout line. Fresh sealer wipes away easily; dried sealer is much harder to remove.
Application checklist:
- Tape off grout lines with painter’s tape
- Apply thin, even coat along each grout line
- Work in small 3-4 foot sections
- Wipe excess sealer immediately with damp cloth
- Remove painter’s tape while sealer is still wet
- Allow proper drying time before foot traffic
How Long to Wait Before Sealing Grout After Installation
New grout needs time to cure before sealing. Sealing too soon traps moisture inside the grout and prevents proper curing.
Most grout needs 48 to 72 hours to cure before sealing. Check the manufacturer’s instructions, as timing varies by grout type and conditions. In cold or humid conditions, wait longer.
New grout must cure 48-72 hours minimum before sealing. Older grout can be sealed anytime after proper cleaning and drying.
Best Grout Sealer for Bathrooms and Moisture-Prone Areas
Bathrooms are the toughest environment for grout due to constant moisture and humidity. Penetrating sealers outperform topical options here, creating a lasting moisture barrier that won’t wear away from daily scrubbing.
For bathrooms, prioritize:
- Penetrating sealers over topical
- Water-based options for safety and ease
- Products rated for high-moisture environments
- Sealers with proven mold and mildew resistance
Drying, Curing, and Common Issues to Avoid
Drying (surface feels dry) differs from curing (sealer reaches full strength). Most sealers dry in 2 to 4 hours but need 24 to 48 hours to fully cure. Avoid water contact during curing. Keep the area dry and well-ventilated with open windows and fans to speed the process.
Understanding and Preventing Cloudy Haze
Cloudy haze on tile surfaces is the most common complaint after sealing. It occurs when sealer dries on the tile instead of being absorbed into the grout, caused by: over-application (excess pooling on tile), slow wiping (sealer begins curing before removal), or sealer incompatibility with tile type (especially glass, polished stone, or glazed ceramic).
Fixing Cloudy Haze After Sealing
If haze has already formed, the fix depends on how long ago you sealed.
The best haze fix is prevention. Apply thin coats, wipe immediately, and work in small sections. Most haze problems disappear with proper technique on the first try.
Other Common Issues and Fixes
Uneven absorption: Some grout absorbs sealer faster than other areas. This is normal and usually not a problem. A second coat evens out absorption and strengthens the seal. Apply the second coat after the first coat fully dries (check product instructions for timing).
Frequently Asked Questions
Do I need to clean grout before sealing it?
Yes. Dirt, mold, and mineral deposits block sealer from bonding properly to the grout. Deep cleaning with a degreaser or specialized grout cleaner removes these barriers, allowing the sealer to penetrate fully and create a stronger, longer-lasting moisture barrier. Skip this step and your sealer won’t adhere as effectively.
How long should I wait after grouting before sealing grout lines?
Most grout requires 48 to 72 hours of curing before sealing. Check your grout manufacturer’s instructions, as some fast-set products cure in 24 hours while others may need up to a week. Sealing too early traps moisture inside the grout and weakens the seal; waiting too long won’t harm it, but delays the protection.
What’s the best grout sealer for bathrooms?
Bathrooms need penetrating sealers that create a water-resistant barrier without changing grout appearance. Water-based penetrating sealers are low-VOC and eco-friendly, while solvent-based options offer stronger stain resistance. For high-moisture bathrooms, look for sealers rated for 100% humidity environments and test compatibility with your tile type first.
How long does grout sealer last before I need to reapply it?
Most penetrating sealers last 1 to 3 years in kitchens and bathrooms, depending on foot traffic and moisture exposure. Topical sealers may last 1 to 2 years. Test by dripping water on sealed grout, if it beads up, protection is still active. If water soaks in, it’s time to re-seal. Professional contractors typically recommend checking annually.