 Nov
22
How to Update Old Tile Floors: 7 Methods
- November 22, 2026
- 0 Comment(s)
Table of Contents
- Why Update Old Tile Floors Instead of Replacing Them
- How to Clean Stained Grout Lines and Restore Color
- Best Grout Colorant for Old Tile: Selecting the Right Product
- Painting Ceramic Tile Floors: Pros and Cons
- Installing Peel and Stick Vinyl Over Existing Tile
- Laying Luxury Vinyl Plank Over Old Tile
- Budget-Friendly Renovation Ideas and Cost-Benefit Analysis
- Common Mistakes to Avoid When Updating Tile
- Frequently Asked Questions
Last Updated: September 25, 2026
Why Update Old Tile Floors Instead of Replacing Them
Replacing tile floors costs thousands of dollars and takes weeks. Updating them costs a fraction of that and transforms your space in days. This is why homeowners and contractors increasingly choose to update old tile floors rather than rip them out entirely.
The real advantage isn’t just cost. It’s speed and flexibility. You can change grout color, refresh the surface, or cover damage without the mess of removal. Grout Shield Distributors has helped thousands of homeowners and contractors revitalize tired tile installations since 1996, and the methods available today make updating far more practical than it was a decade ago.
Here’s what matters: old tile doesn’t mean outdated tile. The ceramic, porcelain, or stone underneath is usually fine. What ages a floor is stained grout, surface wear, or discolored lines. Fix those, and your floor looks brand new.
This guide covers seven proven methods to update old tile floors. Some work best for stains. Others handle damage. A few let you completely change the aesthetic. Pick the approach that matches your situation, timeline, and budget.
How to Clean Stained Grout Lines and Restore Color
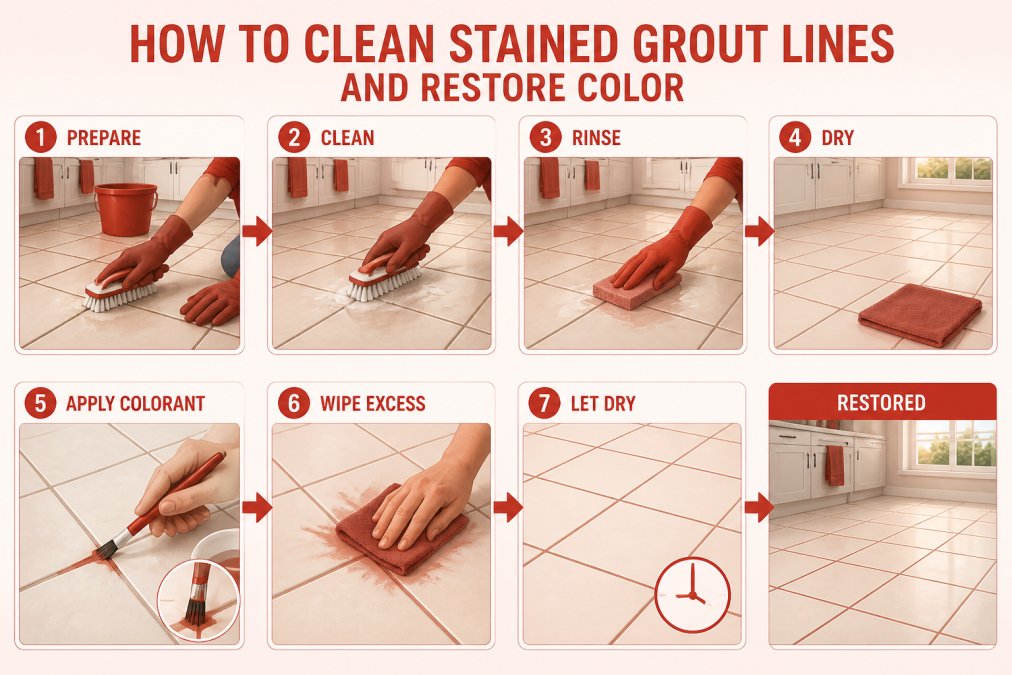
Deep cleaning stained grout lines is the fastest way to restore a tile floor’s appearance. Many homeowners find that cleaning alone recovers 70-80% of the original look, especially when grout has darkened from dirt and mildew rather than permanent damage.
Step 1: Assess the Damage
Before you start cleaning, determine what you’re dealing with. Is the grout stained from surface dirt, or is mold and mildew embedded deep? Run your fingernail along a grout line. If the discoloration comes off, it’s surface dirt. If it doesn’t budge, you need stronger treatment.
Check for cracks or crumbling. Small hairline cracks can be sealed. Deep damage may need colorant or replacement.
Step 2: Deep Clean with Degreaser
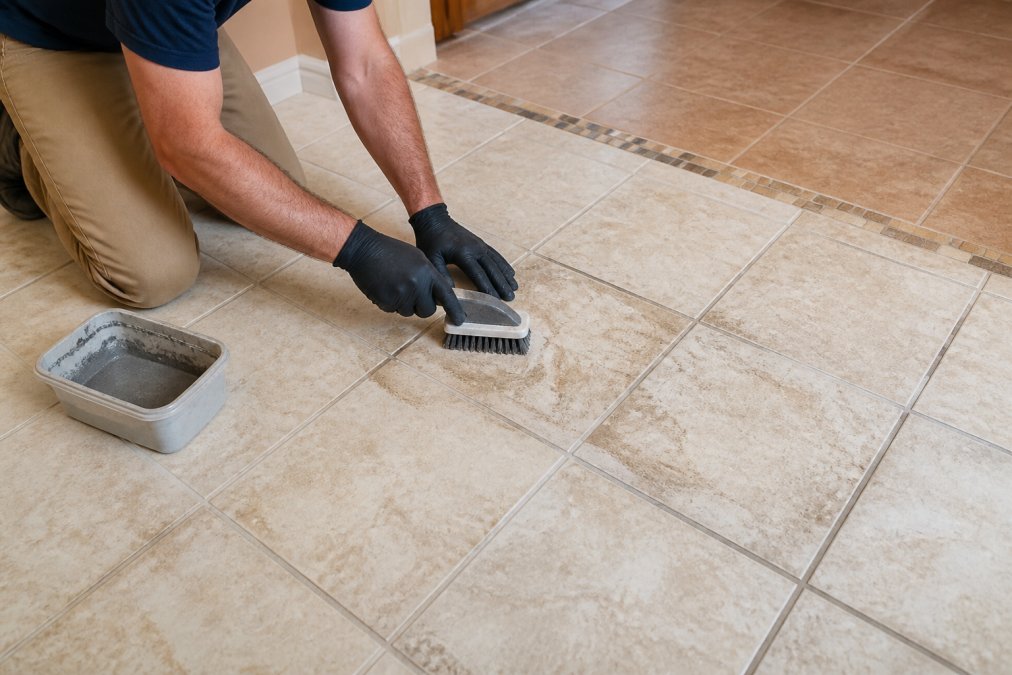
A quality degreaser breaks down buildup that regular cleaners miss. Apply it to grout lines and let it sit for 10-15 minutes. Use a grout brush (a stiff-bristled tool designed for this) to scrub in circular motions.
For stubborn stains, a pressure washer on low setting works, but be careful not to erode the grout. Rinse thoroughly with clean water and let dry completely before moving to the next step.
Step 3: Apply Grout Colorant and Sealer
Once grout is clean and dry, colorant transforms its appearance. Grout colorant bonds to the existing grout and comes in dozens of colors. Apply with a small brush, working section by section.
A sealer locks in the color and protects against future staining. Most quality sealers last 2-3 years before reapplication is needed.
Best Grout Colorant for Old Tile: Selecting the Right Product
Choosing the right grout colorant determines whether your restoration lasts months or years. The best products bond permanently to existing grout, resist moisture, and maintain color without fading.
Color Matching Your Existing Grout
Matching color is the biggest concern homeowners mention. If your colorant doesn’t match, the fix looks worse than the problem. Professional color-matching services eliminate guesswork. Grout Shield Distributors offers over 200 colors with custom matching to ensure your new grout blends seamlessly with existing lines.
If not, take a clear photo in natural light and compare it against color swatches. Test the colorant on a small, hidden area first.
Durability and Longevity Testing
Not all colorants perform equally over time. Quality matters here. Cheap products fade within months. Professional-grade colorants resist UV fading, moisture penetration, and daily wear.
Look for products designed to last. The best colorants bond chemically to grout rather than sitting on the surface. This makes them far more durable in high-traffic areas and moisture-prone spaces like bathrooms and kitchens.
Painting Ceramic Tile Floors: Pros and Cons
Painting tile is fast and dramatic. A fresh coat transforms the entire look in a weekend. But it’s not the right choice for every situation.
When Painting Makes Sense
Paint works best on ceramic tile in low-traffic areas like bathrooms or bedrooms. It’s ideal when you want to change color completely without the cost of replacement. Paint is also useful for covering minor surface damage that colorant alone can’t hide.
Painting doesn’t work well on glazed porcelain or high-gloss finishes. The paint won’t adhere properly. Matte or satin finishes are better candidates.
Preparation and Application Steps
Surface preparation determines whether paint lasts or peels. Clean the tile thoroughly and remove any wax or sealer. Sand the surface lightly to help paint bond. Use a bonding primer designed for tile.
Apply paint in thin coats rather than one thick coat. Two to three coats usually provide full coverage. Use a roller for large areas and a brush for edges and grout lines. Allow proper drying time between coats.
Place An Order Online or Call 1-800-631-0716 →
Installing Peel and Stick Vinyl Over Existing Tile
Peel and stick vinyl tiles offer a quick aesthetic update without permanent commitment. They stick directly to existing tile and can be removed without damage.
Subfloor Preparation and Height Clearance
The key to peel and stick success is a clean, level surface. Clean the tile thoroughly and let it dry completely. Any dust or moisture causes adhesion failure.
Check door clearance before installing. Vinyl adds thickness to your floor. Measure the gap between the door bottom and the floor. Most peel and stick products add 2-3mm of height. If your door clearance is tight, sand down the bottom or adjust the door.
For uneven tile, use a self-leveling underlayment to create a smooth base. This prevents the vinyl from peeling at seams and edges.
Application Process
Start in a corner and work outward. Peel the backing and press firmly, working out air bubbles as you go. Use a roller to ensure full adhesion. Work in small sections so you can adjust if needed.
Overlap seams slightly and trim excess with a utility knife.
Laying Luxury Vinyl Plank Over Old Tile
Luxury vinyl plank (LVP) offers a more permanent solution than peel and stick. It looks like real wood or stone and performs better in high-traffic areas.
Underlayment and Floor Leveling Requirements
LVP requires a stable, level subfloor. Tile isn’t always level. Use a floor leveler or self-leveling compound to fill low spots. This prevents the LVP from flexing or peaking at seams.
Underlayment is essential. It reduces sound, provides moisture protection, and creates a cushioned surface. Choose underlayment rated for use over tile. Install it over the entire floor before laying planks.
Installation Steps and Door Clearance
LVP installs like tongue-and-groove flooring. Start along one wall and work across the room. Stagger seams for a natural appearance. Use spacers to maintain consistent gaps for expansion.
Door clearance is critical. LVP adds 5-8mm of height depending on underlayment. Measure carefully and adjust doors if needed. Trim door frames or sand door bottoms rather than compromise the floor installation.
Budget-Friendly Renovation Ideas and Cost-Benefit Analysis
Not every update requires product application. Sometimes the smartest fix is visual.
Covering Damage with Area Rugs
An area rug strategically placed covers damage while adding warmth and style. This works for localized stains, cracks, or discolored sections. Rugs are removable and reversible.
The downside is that rugs don’t address the underlying problem. Damage continues underneath. This approach buys time but isn’t a permanent solution.
Removal vs. Covering: Long-Term Value
Removing old tile costs thousands of dollars for labor alone. Disposal adds to that cost. A 100-square-foot bathroom can run over a thousand dollars just for removal.
Covering or updating costs a fraction of that. Grout colorant and sealer are an affordable option for most bathrooms. Peel and stick vinyl and LVP are also cost-effective.
The trade-off is longevity.
Common Mistakes to Avoid When Updating Tile
Most failures happen during preparation or product selection, not application.
Frequently Asked Questions
How can I update old tile floors without replacing them?
You have several practical options: restore grout with colorant and sealer, paint ceramic tile with epoxy paint, apply peel and stick vinyl, install luxury vinyl plank over existing tile, cover with area rugs, or deep clean and reseal. Each method works for different budgets and damage levels. Grout restoration is fastest and most affordable for discolored grout. Vinyl overlays can be effective for cracked or outdated tile. The right choice depends on your floor’s condition, budget, and how long you need the update to last.
What makes grout colorant better than regrouting the entire floor?
Grout colorant is faster, less invasive, and significantly more affordable than removing and replacing all grout. Regrouting requires hours of labor per room and creates dust throughout your home. Colorant and sealer restore appearance in a single day with minimal disruption. Modern colorants bond to existing grout and provide durability comparable to new grout when sealed properly. For stained or discolored grout, colorant is the cost-effective solution that avoids the mess and expense of full regrouting.
Will grout colorant work on black mold and mildew-stained grout?
Yes, but only after thorough cleaning. Deep cleaning with a degreaser removes mold, mildew, and surface stains before applying colorant. Skipping this step wastes the colorant because it won’t bond properly to dirty grout. Once the grout is clean and dry, colorant and sealer create a protective barrier that resists future mold growth. For severe mold, you may need to repeat cleaning or use a stronger degreaser. Sealing after colorant is essential to prevent moisture and mold from returning.
How do I know if peel and stick vinyl or luxury vinyl plank will hold up in high-traffic areas?
Luxury vinyl plank (LVP) is more durable than peel and stick for high-traffic spaces. LVP uses adhesive and underlayment for permanent installation, while peel and stick relies on surface adhesion that can weaken over time. Both resist moisture and wear well in kitchens and bathrooms. For longevity testing, check the manufacturer’s wear layer thickness and warranty length. LVP can last for many years in high-traffic areas when installed over properly prepared subfloor. Peel and stick can also provide good longevity. Subfloor prep and proper underlayment directly affect durability.